This is Open Source Home Automation Project based on Arduino Uno and Arduino Wiznet based Ethernet shield.
How Does it Work
The main brain for this project is Arduino UNO Board along with Arduino Ethernet Shield to give it a wireless connectivity.Arduino runs a code to control a Relay board according to the input and also serves a web page through which respective output to the relay board can be controlled.Through relay controller board we can control lamps, tubes or any AC power sockets.
You will be able to control all of your AC Appliances wirelessly with the help of any WIFI Enabled device.
STEP 1:
Relay Controller Board Build Tutorial:
Quantity of the components depends upon how many channels you want e.g. if you want to control more than one light then you will have to add that much number of relays on your controller board.
Here is the material list which will be needed to build the board: (Quantity of the components given for making 1 channel relay controller)
| Sr.No | Component Names | Quantity |
| 1 | Relay (I have used GOODSKY RWH-SH-105D Relay) | 1 |
| 2 | Transistor 2N3904 | 1 |
| 3 | 1K Resistor | 2 |
| 4 | 10K Resistor | 1 |
| 5 | 1N4148 Diode | 1 |
| 6 | Red Led 3mm | 1 |
| 7 | 3 Pin PCB Mount Connector | 1 |
| 8 | 1 Pin PCB Mount Connector | 1 |
Above components are for making of single controller board you can multiply number of the components depending on how many relay controller you want.

Here in the circuit diagram Pin no.2 will be connected to the arduino control output pin and other two will be connected to +5V and Gnd accordingly.
After soldering all of your components according to the above circuit diagram the board should look like this.

Front View

Rear View
This is single relay controller board. You can extend this to as many as you want. I have made 5 channel relay controller board as below.


Note:
All the usual warnings apply: Mains voltage (120VAC or 220VAC) can kill you. This project, if done incorrectly, could certainly burn down your house. Do not work on or solder to any part of a project while it is plugged into the wall socket - just unplug it before modifying anything!
STEP 2:
Getting IP Address Of Arduino Ethernet Shield:
Mount your Arduino Ethernet shield on Arduino Uno as shown:


Now connect your Uno Board to PC with USB cable and open Arduino IDE. After Opening up you will find blank Arduino window. Now go to File--> Example --> Ethernet --> dhcp address printer sketch. Your Ethernet shields MAC address is printed on back of it as follow you will need this in DHCP ADDRESS PRINTER code to get the IP address of your Ethernet shield.

In DHCP address printer sketch put your MAC address as given on back of the Ethernet shield and upload it to the Arduino board.

After finished uploading connect Arduino Ethernet shield to internet with Ethernet cable once connected then open up you serial monitor of Arduino IDE the IP address allotted to your Ethernet shield will be displayed e.g. (xxx.xxx.x.xxx) note it down somewhere because you are going to need this in further codes.
STEP 3:
BuildingMainCircuitConnection :
Now we are ready with our Relay controller board. So, it’s time to move on to the Main Circuit Connections. Here I have given the pin configuration for the whole Autohome Project.
| Arduino Digital Pin No. | Pin Usage |
| 4 | will be used for Infrared Receiver |
| 5 | used as Output Pins to control Relays |
| 6 | used as Output Pins to control Relays |
| 7 | used as Output Pins to control Relays |
| 8 | used as Output Pins to control Relays |
| 9 | used as Output Pins to control Relays |
| 10 | will be used by Arduino Ethernet Shield |
| 11 | will be used by Arduino Ethernet Shield |
| 12 | will be used by Arduino Ethernet Shield |
| 13 | will be used by Arduino Ethernet Shield |
Note: For relays it is recommended to power it from separate source not from Arduino (I have powered it from Arduino only but since here we are working with single board. As board number increases Arduino won’t be able to supply sufficient power to the boards.)
Here is the connection diagram:

In this way you can do necessary soldering work to make following connection.
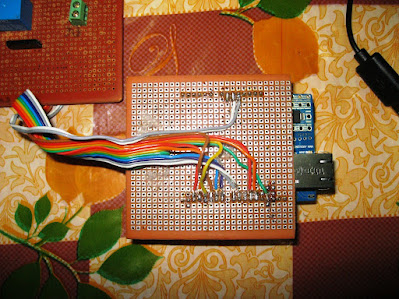
You can also make your own protoshield which can easily fit on top Arduino like this:

Once you finish soldering stuff, now you are ready for your main code upload.
STEP 4:
Uploading Arduino AutoHome code to the Board:
Here is the Arduino AutoHome code just copy and paste it into your Arduino IDE sketch.
| 123456789101112131415161718192021222324252627282930313233343536373839404142434445464748495051525354555657585960616263646566676869707172737475767778798081828384858687888990919293949596979899100101102103104105106107108109110111112113114115116117118119120121122123124125126127128129130131132133134135136137138139140141142143144145146147148149150151152153154155156157158159160161162163164165166167168169170171172173174175176177178179180181182183184185186187188189190191192193194195196197198199200201202203204205206207208209210211212213214215216217218219220221222223224225226227228229230231232233234235236237238239240241242243244245246247248249250251252253254255256257258259260261262263264265266267268269270271272273274275276277278279280281282283284285286287288289290291292293294295296297298299 |
So you will have the control page as shown below:

As you understand the code you can modify to your need.
So enjoy controlling things wirelessly..
GREAT PROJECT ! ! ! ! ! ! !
ReplyDeleteIs there an easy way to password protect the web server?
Hi Dhiaraj
ReplyDeleteI wanted to know what is the best way to know if current is passing through a switch. So let me explain better. If these two switched are in parallel there is a feedback on the state of the switch if we turn it of from the aurduno but what can be done to get a feed back if the switch on the wall is turned on . Is there a mechanism that can send a signal aying what is the state of the switch
hey. i am very interested with your project and i am thinking of making this project as my final year project. may i get the full report of the project? please contact me at my email, maziyatulkarimah@gmail.com. thank you. have a nice day.
ReplyDeletedid u do it
DeleteEmail me if you have any Details abt Project @ jivankumar.pachpute999@gmail.com
Deletehi,, dhiaraj
ReplyDeletei'm thinking about your project to make it self .can you email me the project report? whitewall993@gmail.com
Everything about the project that you would need to do it yourself is mentioned in the blogpost. What else do you want?
ReplyDeletei'm worry about enternet shield,,
Deletethanks
how do you get the ethernet shield to work with the arduino mega? please help me
ReplyDeleteThis comment has been removed by the author.
ReplyDeletenice work!
ReplyDeleteI want to make something similar, but adding some pir sensors for home alarm system.
I already ordered an arduino Leonardo and arduino Ethernet shield.
Lucky for me, I hade from an old project an TC35 gsm module, and I want to use it for sms remote.
Can u help me with the using the gsm sheild for home automation
Deleteyea its pretty simple using AT commands
DeleteVery helpful..thank you so much..i am doing a similar project for my final year engineering course and i would like to clarify a few things..please contact me at aravindkv805@gmail.com..thanks again
ReplyDeleteHello,
ReplyDeletelet's say i'm running the web control for switches at home, and there is someone at home who wants to switch manually at the same time while the web control is running.
So do you have a solution for that ?
Thank you
the solution is simple. just use a two way switch as the manual control switch
Deletehelloo can u please help me i have an wifi shield and i can not access the page that appears in the serial monitor can u do an sketch for the wifi shield
ReplyDeleteHi,
ReplyDeleteYou should probably check out the MySenors project to make your sensor wireless using the nRF24L0 radio.
Website:
http://mysensors.org/
Github:
https://github.com/mysensors/
Cheers
Henrik
is ethernet shield cable rj45 is connected to laptop or some other place??
ReplyDeleteit can be connected to laptop. else to the lan 1 ,2,3 ports on the router to get it enabled through wifi...
Deleteip adress should mentioned in the code should be used in the web browser when accessing through wifi enablede devices.
it can be connected to laptop. else to the lan 1 ,2,3 ports on the router to get it enabled through wifi...
Deleteip adress should mentioned in the code should be used in the web browser when accessing through wifi enablede devices.
How to obtain IP address if it is connected to laptop?
DeleteYou have here one of the best Arduino Uno projects for both beginners and advanced users. I write an article especially for beginner users to help them starting building electronic projects using the Arduino Uno board. Here is the link to the article
ReplyDeletehttp://www.intorobotics.com/arduino-uno-setup-and-programming-tutorials/
How can I get IP address for me.
ReplyDeleteThis comment has been removed by the author.
ReplyDeleteHello, can anyone help me?
ReplyDeletei want to build bell door wireless for deaf people using two ethernet shield. The idea is, if someone press the bell on the door, it will transmit the output to arduino 1 that connect to ethernet shield 1 and display it with LED and also transmit the output using wireless router to arduino 2 mounted with ethernet shield 2 and display it with LED on the other room. I don't plan using web server based. And all the example from the web is using internet connection and accessing/controlling via web, so i'm troubled over here. Help me please, i really appreciate it!
taraswetlana@gmail.com
Hello T
DeleteNice I am really interested in your project for elderly if you have completed can you please share
Thanks
hi,, dhiaraj
ReplyDeletei'm thinking about your project to make it self .can you email me the project report? pbawan24@gmail.com
does this work with the latest ide?
ReplyDeleteThanks for sharing. I like the graphics displayed on the page.
ReplyDeleteThanks for sharing. I like the graphics displayed on the page.
ReplyDeleteGreat work, but I have a problem. I connected everything ( I bought relay module on ebay), but it wont work. When I click "turn light on" nothing changes. Serial monitor gives "GET", but even in the table at the bottom of the page nothing changes. Any ideas?
ReplyDeleteI agree with you
DeleteThanks,
Mcx Tips Free Trial
This comment has been removed by the author.
ReplyDeleteHey Dhiaraj,
ReplyDeleteI really like your project!! I would like to know if I can connect all the components on a breadboard instead???
And would like to know more details about your project as I would like to make it a part of my course work. Kindly mail me the report of you project. deeksha.dhanush@gmail.com
Thank you
Wow diraj, what a talent, I am speechless. You have done such a amazing work about home automation products that I cant even thing about that, thanks for sharing.
ReplyDeleteHi.. Great work! It worked for me. I would like to know how to control the devices using other routers/ gateway. For example I would like to control from my office..
ReplyDeletePlease help me out with this..
Your description is really very nice and interesting in which there is the discussion about Internet things. Thanks for sharing this info and please keep sharing.
ReplyDeleteSecurity service in vancouver | Security Service in Vancouver
This comment has been removed by a blog administrator.
ReplyDeleteThis comment has been removed by a blog administrator.
ReplyDeleteThis comment has been removed by a blog administrator.
ReplyDeleteThis comment has been removed by a blog administrator.
ReplyDeleteHow to access the IP address if I am not at home!
ReplyDeleteThis comment has been removed by a blog administrator.
ReplyDeleteThis comment has been removed by a blog administrator.
ReplyDeleteAndroid Wi-Fi Home Automation,Wi-Fi Home Automation – Arduino
ReplyDeletehttp://microcontroller-embedded-electronic-projects-online.com/2015/11/17/android-wi-fi-home-automationwi-fi-home-automation-arduino/
The devices can be switched ON/OFF using a SMART PHONE through Wi-Fi.
hello,
ReplyDeletei couldn't get the ip address of the ethernet shield . i have tried to get it using DHCP address printer but it results that 'failed to configure the ip address using dhcp' .the board was not given the mac address with it ,i have typed the default mac ...even though i was not able to trace the IP address. can you please help me out
This comment has been removed by the author.
ReplyDeleteVery nice, well written documentation and code.
ReplyDeleteI really like how well it works, you have awoken so many ideas.
Thank you!
Hmm that’s a nice post as I never thought about, it is truly remarkable. one for all universal remote
ReplyDeleteHey, nice work. I envy your programming skills! It seems logical that your next step would be to build a nice android app to connect it all.
ReplyDeleteI had this same idea, but the programming is intimidating. SO I'll share the rest of my idea with you, maybe it'll spark ideas of your own.
First, there are premade relay boards for cheap. Really cheap. Example (on amazon.com): http://amzn.com/B00WQR9Y20
So, relays are just high power switches- you can control virtually anything with them that turns on or off with power. If you've got some wiring knowledge, the possibilities.... electronic door strikes (control your door locks from anywhere, remotely!), power buttons on computers, networking equipment (if you cant be there to physically reboot them), garage door, lights, or anything you can run 5vDC to. And do it all without paying some middle company to keep track of your IP address.
Even i tried to make the relay board
ReplyDeleteN the 1k resistor between the Base of the transistor and input pin from arduino is not required only
Actually my circuit dint worked so i just connected the relay input pin to the base of the transistors my circuit did worked
sir i have same arduino ethernet but not mac address plz tel me how to fine mac adress my shild whithut botom side stikar i have not see plz help me sir
ReplyDeletesir i have same arduino ethernet but not mac address plz tel me how to fine mac adress my shild whithut botom side stikar i have not see plz help me sir
ReplyDeletesir i have same arduino ethernet but not mac address plz tel me how to fine mac adress my shild whithut botom side stikar i have not see plz help me sir
ReplyDeletesir plz replay -+ i have not wotak wad pag opan but rx tx light blink but relay not working
ReplyDeletemy id teenu.1988@yahoo.co.in
DeleteHey I need some help in this project. How can I contact you?
ReplyDeletehey i need some help in this project . how can i contact you?
ReplyDeletesir i have same problem .you got the answer??
ReplyDeletehow can i cantact you .
please where is the Infrared Receiver???
ReplyDeleteplease someone answer thanks
Sir when I upload the dhcp printer code the serial monitor shows
ReplyDelete"Failed to Configure ethernet using dhcp".
I'm stuck here, what should I do next?
From what too did you draw all these circuit diagrams or what is the tool you usually use to draw logic gates diagrams? Is it creately ?
ReplyDeletehey can you send me its project report please
ReplyDeletebecause i'm doing same project using,
Arduino uno r3+ethernet sheild+Relay with concept of IOT
nice project! Thank you
ReplyDeletewould it be possible to make it password protect?
ReplyDeletehow can i access from outside local network
ReplyDeleteverry esey this u have erthe net try u remove erther net shild your using esp8266 wifi shild
ReplyDeletecan you help me !!!!!!
DeleteHey i think this project will work if i enter my external ip address and port number (normally 80) and forward the port in my modem + router`s setting to the arduino....and so i`ll be able to switch my home lights on or off...from the internet..
ReplyDeletePlz Give me your Contact No. by SMS/Whatsapp-9890988743
Deletei'm trying this Project as BE Project.
jivanp1993@gmail.com
Hey plz help me for this Project.. 9890988743
ReplyDeletei am rohith
ReplyDeleteplease help me out
iam working with esp 8266 wifi module and arduino
iam unable to understand the interface and how the pointer are working
.. 8688166675
can you send me your full report? i am interested to make this project as my fyp. you can send it to my email jalwaazahidah@gmail.com
ReplyDeletehow to make connection is not clr pls send me circuit diagram to connect shild to ardiuno and relay
ReplyDeletei used ua code in my project the relay is turning on but not turning off ... plzzzzz send me the required code in mail khnarshid20@gmail.com thanks in advance ... waiting for ua mail
ReplyDeleteGreat article, I've read it completely and got answers of many things which i didn't knew before keep on posting good things. Please keep updating us.
ReplyDeleteVideo Surveillance Vancouver | Vancouver Security Cameras
Home automation systems are designed to be compatible with every kind of home and lifestyle,helping to make our daily lives easier and more comfortable.
ReplyDeletecan you send me your full report? i am interested to make this project as my fyp. you can send it to my email prasaanth71293@gmail.com
ReplyDeleteHave you got
DeleteCSS file side is down!!!
ReplyDeleteHai the side is down the program is not showing the css file anymore Everything works but the buttons and page layout are gone.
please help
By Frank
Such a nice blog post. That is very nice project with cording that is easy to understand. I like it very much and more useful for my knowledge.Thank you for sharing this post.
ReplyDeleteAudio visual Hamilton
Thanks for sharing such beneficial article with us.
ReplyDeleteGuard Tour System
Thanks for sharing your project with us. This is very useful and informative for users. Please keep sharing with us.
ReplyDeleteHome Automation Surrey | Security system New Westminster">
project is corrupt Shame on you for not answer help queation.
ReplyDeleteThis comment has been removed by the author.
ReplyDeleteBeing just a shade beyond beginner I can say this is a great example of how to automate things using a ethernet shield and arduino. I did make one small change that may help other out when they try expanding upon the script.
ReplyDeleteI receive a warning using an UNO that the above script used a lot of dynamic memory. I was able to decrease the dynamic memory usage from 92% down 26% by using the F() macro. Example changing all of the static client.println("what ever text is here"); text statements to client.println(F("what ever text is here")); Reference: http://blog.startingelectronics.com/a-comparison-of-arduino-sketch-sizes-in-memory/
@ 4th pin what is the use of ir sensor ???????
ReplyDeletenice blog
ReplyDeleteElectronic project building for beginners
They also sound your security system’s alarm when a criminal tries to gain entrance into your house. Smarter cctv system
ReplyDeletehow to check internet connectivity ?
ReplyDeleteWhen I upload code then show me this message "Low memory available, stability problems may occur."
ReplyDeleteWhat should I do now???!!!!
Use a Mega. The program uses a lot of memory.
ReplyDeleteNow, some how your code is runed... but CSS file is missing and LED is not working.. what should I
Deletedo now?
download css into Dropbox publick, create a publick linh and put that one in the place off the one that is in the arduino.ino file.
Deletehttps://code.google.com/archive/p/arduino-autohome/downloads
take a nice background put that one also in a dropbox public. create link and copy that into the css file aswell.
should work see my example https://dl.dropboxusercontent.com/u/51943663/example.jpg
running on uno with eternet mega and Nodemcu .
For who is interested. I did some work on this program and made it looks a lot better. I have made a CSS file and put it on my Dropbox. Now i can remotely change the background as i like ☺. the buttons made in a different color and ad a visibility to see if they are on or off.
ReplyDeletealso added a Rf transmitter to is so i can remotely turn my lights off and on from the internet. the transmitter code is simple the tricky part is finding a remote socked 433 MHZ and read the code, but there are multiple side's that have ex samples.
Also a DS3231 is added.
here is a screen shot; ( tekst in button is Dutch but you can change that!)
https://dl.dropboxusercontent.com/u/51943663/example.jpg
if anyone wants too know more please let me know
Good day sir. I was about to make this project. I'm having a problem uploading dhcpprintersketch. It has errors like these:
ReplyDeleteArduino: 1.6.11 (Windows 7), Board: "Arduino/Genuino Uno"
Sketch uses 12,494 bytes (38%) of program storage space. Maximum is 32,256 bytes.
Global variables use 682 bytes (33%) of dynamic memory, leaving 1,366 bytes for local variables. Maximum is 2,048 bytes.
avrdude: ser_open(): can't open device "\\.\COM1": The system cannot find the file specified.
I hope you could help me.
Thank you.
in my version of this project
ReplyDeletei used a sensor(light sensor) hidden around the light source and through extended connections connected to the the arduino
however i cannot put in the condition of when to switch them all off
it works but i dont know how to perfect it
any ideas??
ReplyDeleteI am expecting more interesting topics from you. And this was nice content and definitely it will be useful for many people.
Home Automation in Chennai
smart home in Chennai
Home security in Chennai
Burglar alarm in Chennai
Door sensors Chennai
Can u send me the details of this project on my email. I like to make it as my Final Year Project.
ReplyDeleteprixitsharma3@gmail.com
how to make this project can be accessed in different network?
ReplyDeleteDid you read the code?
ReplyDeleteif you look at this part
======================================
byte mac[] = { 0x90, 0xA2, 0xDA, 0x0D, 0x78, 0xE0 }; // <------- PUT YOUR MAC Address Here
byte ip[] = { 192, 168, 1, 102 }; // <------- PUT YOUR IP Address Here
byte gateway[] = { 192, 168, 1, 254 }; // <------- PUT YOUR ROUTERS IP Address to which your shield is connected Here
byte subnet[] = { 255, 255, 255, 0 }; // <------- It will be as it is in most of the cases
EthernetServer server(80); // <------- It's Defaulf Server Port for Ethernet Shield
================================================================
change port 80 to a port you would like.
port forward it in your router.
use external ip adres from your router ( 82.36.451.23: port number )
than you can login to this webserver from the internet all over the world!
good luck.
the line;
ReplyDeleteuse external ip adres from your router ( 82.36.451.23: port number )
is an exsample you can find your external ip adres in your router.
do not share this adres on this side or every one can swir your lights on or off!!☺
thank you sir, when i change the ip to my public then i can login over the world. is there any way to turn on the led when the connection down? when we outside the house.
DeleteThis comment has been removed by the author.
ReplyDeleteYou can build it a if else statement in this skets. in de begin of the void loop there is already a line that checks the internet connection. just put the a else state and put there a port for the Ledstate HIGH and in the rest off the sketch ledstate low. make sure that you use } to close the else state or you will get a compile error. On the Arduino side you can find a good exsample for the if else state. Goodluck
ReplyDeleteand if you want to turn on a led without a internet connection sorry that is impossible.
ReplyDeletelet met try it, thank you sir
ReplyDeletei will reply the report soon
Hello Dhiraj,
ReplyDeleteCan you please help me with the sketch for 8 relays and and password protection for the app.
Hello Dhiraj,
ReplyDeleteCan you please help me with the sketch for 8 relays and and password protection for the app.
This comment has been removed by the author.
ReplyDeleteThis comment has been removed by the author.
ReplyDeletei want uml diagrams for this project plz any one can help me
ReplyDelete
ReplyDeleteI can't access it from others network. what should I do now???
Check if your router has portforwarding, Then put the IP and port from your Aurduino in the port forwardingsection and check if that port is not been used by a other item in your router.
ReplyDeletesucces.
Please, Tell me something about port forwarding... I tried but failed.. :(
DeleteThat fine project, but i want to do on proteus. what can i do? pls contact with on 123gmtekle@gmail.com
ReplyDeletethen control should directly navigate to home page of another application (as if both applications deployed in the same domain). Complete Home CCTV Systems
ReplyDeleteThank you for the wonderful project
ReplyDeleteNice blog post on Open Source Home Automation Project using Arduino UNO + Ethernet Shield. I can imagine having every operation in the house automated. On the positive side, there will be more time the family members to bond and spend time together and those studying can have more time to focus on their studies and access online writing services for help when Redoing Dissertation.
ReplyDeleteThis is nice information on this blog regarding home appliances online, Thank you so much for this.
ReplyDeleteHello,
ReplyDeleteI've designed a PCB for the Relais.
Your post is extremely helpful. I will keep following. Thank you for sharing this information.
ReplyDeleteWebsite Design Companies Bangalore | Web Design Services Bangalore
Samsung Fridge Service Centre Hyderabad. You have any kind of technical issues contact our service centers. PH: 040 60506610, 8374199400, and 040 65556634 etc......
ReplyDeleteN.S.C Electronics is leading air curtain manufacturers and air curtain suppliers in India, Mohali, Chandigarh, Delhi, Jaipur and other city also. 10 Years of experience. 09815048244
ReplyDeleteair curtain manufacturers
air curtain manufacturers in India
air curtain suppliers
Passbox manufacturers
static pass box manufacturers
dynamic pass box manufacturer India
clean room pass box manufacturers
it is really amazing to read this type of article..it will help me to explore my services in Jaipur For
ReplyDeleteac service centre in Jaipur,
ac repair in Jaipur,
Split ac service centre in Jaipur,
Window ac service centre in Jaipur
it is really amazing to read this type of article..it will help me to explore my services in Jaipur For
ReplyDeleteac service centre in Jaipur,
ac repair in Jaipur,
Split ac service centre in Jaipur,
Window ac service centre in Jaipur
it is really amazing to read this type of article..it will help me to explore me in Jaipur For
ReplyDeleteBike on rent in Jaipur.
The locksmith services are really important for your safety too)
ReplyDeleteaoa sir can you provide code and circuit diagram i am very thankful to you chaudarybilal618@gmail.com
ReplyDeleteit is all in the top off this article !!
Deletewhich is one of the most stringent review sites online. Sydney CCTV Installation
ReplyDeleteVery Usefull information shared than other blogs
ReplyDeleteThanks for Sharing and Keep updating.....
Hey, that’s really a good post on Electronics Appliances Classifieds Help Adya, i really like your blog as the information is very useful if you are a pet lover. Well, there is one more site for the same service www.helpadya.com you should check it for more detail.
ReplyDeleteGreat Blog,I have read your blog its very helping this information i got in details it very cleared Thanks for sharing this and keep sharing Profx in Bangalore | Video Automation Company Bangalore | Amplifiers in Bangalore | Home theatre in Bangalore
ReplyDeletecan give me ur email?i have some question want ask u..
ReplyDeleteHey your blog is very nice, such useful information you are sharing. I really like your blog the information is very accurate and if you want to know more about List of Television Dealer in Delhi service, there is another website with best information.
ReplyDeleteHi Dear,
ReplyDeletei Like Your Blog Very Much..I see Daily Your Blog ,is A Very Useful For me.
Construction Site HD CCTV Monitoring & Turnstile in London. We provide our customers efficient security services according to their needs at bisonsecurity.co.uk
Visit Now - http://bisonsecurity.co.uk/
Construction Site Monitoring
You have shared really an amazing and nice post about the iot,.
ReplyDeletehydroponics
AC repair in Hyderabad
ReplyDelete
ReplyDeleteAC repair in hyderabad.Call Us:040-60506610,60506611,60506622
ReplyDeleteThanks for sharing such a great information..Its really nice and informative.
123 HP Setup 6968
Nice Blog.Thanks For Sharing Information.
ReplyDeleteWebsite Design Company
SEO Company
Internet Marketing - Netguru Solution
Website Development Company
Website Maintenance
Website Design Pune
this project over internet? or only lan?
ReplyDeleteCXOs share their vision on how they are leveraging AI + automation + machine learning to drive higher efficiencies across organizations #Automation#changes#business#technology within their companies.Teb Shift
ReplyDeleteThe blog you have shared is very informative Home Theater Showroom in Bangalore | Home theatre in Bangalore
ReplyDeleteNice blog..! I really loved reading through this article... Thanks for sharing such an amazing post with us and keep blogging...
ReplyDeleteelectromagnetic locks suppliers
boom barriers
Very Nice Blog , I really reading this type blogs when then my mind its off and your blog information so good
ReplyDeleteWe bring you an Amazing Collection of Useful DIY Tools at Very Reasonable Prices. We do our utmost to ship out your orders and reply to your enquiries as quickly as possible. We guarantee our products with an easy return policy. Visit Here: DIY Tools
Excellent information with unique content and it is very useful to know about the information based on blogs .
ReplyDelete| Home Automation in Bangalore
thanks for sharing Change wifi password
ReplyDeleteTooth Saviours Dental Clinic is Best Dental Clinic In Vaishali Nagar,chitrakoot Jaipur.Clinic Offer services like Root Canals,Oral Surgery,Whitening,Orthodentic,Implant and Dental Checkups in Jaipur.
ReplyDeleteDentist in Jaipur,
Root Canal in Jaipur
Thanks for sharing excellent information.If you Are looking Best Website Development Company in jaipur,Website development Company in Jodhpur, Jodhpur, Bikaner,
ReplyDeleteUdaipur,Kota and Ajmer than Please Have A CAll- +91-8426833930.You Are At Right Digital Consultant in jaipur.
Thank you for your post. This is excellent information. It is amazing and wonderful to visit your site
ReplyDeleteelectromagnetic locks suppliers
boom barriers
electromagnetic locks manufacturers
door interlocking system
Great Article!!
ReplyDeleteLinux Online Training India
Online devops Training India
Online Hadoop admin Training India
sir , i am not able to control the realy board with the help of buttons on the HTML page , can you tell me what is the main problem.
ReplyDeleteWill you please forward me the full report of this project? I am working on this project as my final project.so please send me its detailed report at dreamhighrupesh@gmail.com ,thank you
ReplyDeleteLots of thankssss... <3 <3 <3
ReplyDeleteThanks for sharing. keep sharing information about home automation system
ReplyDeleteThank's for sharing this details...............
ReplyDeleteDriver In Pune
I have found this information to be extremely valuable which will definitely help others. Thanks for the article. Great!Home Automation Products in Bangalore | Audio Automation Company Bangalore
ReplyDelete
ReplyDeleteUseful Information, your blog is sharing unique information....
Thanks for sharing!!!
road blocker in mumbai
electromagnetic locks
automatic bollards in mumbai
turnstile systems
tripod turnstiles
thanks for shearing such an informative blog with us. it is really helpful information that how someone can save his site.
ReplyDeleteOnline Marketing Services
SEO Specialist in Bangalore
global seo packages
I can't read articles online all the time, however, I'm happy I did today. This is extremely elegantly composed and your focuses are very much communicated. Kindly, absolutely never quit composing. Ethernet cords
ReplyDeleteGood post. I am very fond of hardware and networking related products. With so many products and so many things to learn about these products it is quite amazing. My aim is to become leading networking product dealers in Chennai.
ReplyDeleteThanks for posting the useful information to my vision. This is excellent information,.
ReplyDeletetripod turnstiles in mumbai #Solar power fence in mumbai #flap barriers in mumbai
#electromagnetic locks manufacturers in mumbai
This information you provided in the blog that is really unique I love it!! Thanks for sharing such a great blog. Keep
ReplyDeleteposting..
summer training for electronics engineering students
summer training for ece students
summer training for ee students
Nice Blog
ReplyDeleteHome Automation Companies
Nice Blog
ReplyDeleteIOT based Home automation System
This comment has been removed by the author.
ReplyDeleteReally superb. I like this type of Blog.Thankful to you.I am very fond of hardware and networking related products.
ReplyDeletesoftware testing training
Hello,
ReplyDeleteReally nice blog, Thank you for sharing such informative and codding assignment.Also check bestIOT Solution Providers
The Netgear Genie Smart Setup wizard enables you to setup your Netgear extender through the www.mywifiext.net Web browser of a device that's connected to your current Wi-Fi network. You need to know some details about your Wi-Fi network -- such as the network’s password -- to complete the configuration. Since the extender pushes your current Wi-Fi network’s signal beyond its current limit, you won’t have to worry that the wireless signal will drop unexpectedly at a critical moment, such as submitting an assignment online.
ReplyDeleteThanks for posting the useful information to my vision. This is excellent information,.
ReplyDeleteautomatic gates
boom barriers
Thank you for all of your work on this blog. Kate enjoys doing internet research and it is easy to understand why. A lot of people learn all of the powerful mode you deliver great guidance by means of the blog and as well as recommend contribution from others on that idea so our favorite child is always becoming educated a great deal. Take advantage of the rest of the year. You are always carrying out a fantastic job. real estate seo
ReplyDeleteBest practical oriented automation training course with hands on training for every participant with dedicated many PLC systems and PC.Well prepared course material and PLC software and study material will be provided during the course. Call @9953489987.
ReplyDeleteVery Nice.
ReplyDeleteThanks for sharing useful information Image Processing Projects Chennai | ME Project Centers Chennai
Nice Blog. Thank you.
ReplyDeleteInternet of Things Training | IoT Certification
It is really a great and useful piece of info. I’m glad that you shared this helpful info with us. Thank you for sharing.ME Project Centers Chennai | Ns2 Mini Projects in Chennai
ReplyDeleteThanks for sharing useful information.you can refer best Final Year Matlab Projects Chennai | 2018 2019 Neural Networks Projects Chennai
ReplyDeleteGreat post. Thanks for sharing.
ReplyDeleteWifi SmartPlug
Thank You.
ReplyDeleteMba Application Projects in Chennai | Ms Project Centers in Chennai
Hi, Thanks for a nice information, it is really nice information.
ReplyDeleteIOT Training Institutes in Ameerpet
I believe there are many more pleasurable opportunities ahead for individuals that looked at your site. Thanks for shared information.
ReplyDeleteApplication Mini Project Centers in Chennai and ME Project Centers Chennai
I have read your blog its very attractive and impressive.I like it your blog.
ReplyDeleteCloud Computing Project Centers in Chennai.
Really wonderful post.Thanks for sharing such an informative post to our knowledge.
ReplyDeleteMca Project Centers in Chennai | ME Project Centers Chennai.
Very well explained sir, I have learned so much from it.. Thanks for sharing such a useful and informative blog with us..
ReplyDeleteInternet of Things (IoT) Training in Hyderabad
Internet of Things (IoT) Training in Ameerpet
Thanks for posting the useful information to my vision. This is excellent information,.
ReplyDeleteelectromagnetic locks manufacturers
hydraulic road blockers
• Nice and good article. It is very useful for me to learn and understand easily. Thanks for sharing your valuable information and time. Please keep updating IOT Online Training
ReplyDeleteThis comment has been removed by the author.
ReplyDeleteI found some useful information in your blog, it was awesome to read, thanks for sharing this great content to my vision, keep sharing.for more information pls click her
ReplyDeleteIoT Training In Hyderabad
Wiznet India
ReplyDeleteFri, Jun 22, 11:12 AM
to wildansnahar
Hi,
Nice to meet you.
We are the WIZnet Team in India.
We have been searching some application references in which WIZnet solution is applied and found your project " Open Source Home Automation Project using Arduino UNO + Ethernet Shield" . Your development looks very cool & smart.
Recently we have developed WIZnet Museum (http://wiznetmuseum.com) site. This is an academic-purposed collection of open projects, tutorials, articles and etc from our global customers.
If you are O.K. we would like to introduce your project and device in here. Hopefully, you will allow this.
Hopefully, keep contacting us for the friendship.
Thank you very much
Wiznet team, India
The post is useful and it would really help for those who search for
ReplyDeleteAuditoriums in Bangalore | Video Automation Company Bangalore
Nice blog..! I really loved reading through this article. Thanks for sharing such a amazing post with us and keep blogging...
ReplyDeleteWorkFusion Training in Hyderabad
Automation Training in Noida | Industrial Automation Training in Delhi- 9818293887
ReplyDeleteCertified Placement Oriented Course in Industrial Automation Like PLC, Scada, HMI, DCS, Process Instrumentation, Panel Designing, Drives and Servo Motors etc. Make yourself Industry ready with “Dynamic Institute of Automation & Controls” and boost up your Career. Call @9953489987.
Really very decent post. Thank you for sharing.
ReplyDeleteAV Receiver in Bangalore | Home Automation in Bangalore
Excellent blog, good to see someone is posting quality information. Thanks for sharing this useful information. Keep up the good work.
ReplyDeleteENER-J LED Desk Lamp Dimmable
It is good to visit your blog, this is very useful and informative. Thanks for sharing!
ReplyDeleteData Science Online Traning
Nice and good article. It is very useful for me to learn and understand easily. Thanks for sharing your valuable information and time. Please keep updating IOT online training
ReplyDeleteI have read your blog its very attractive and impressive. I like it your blog.
ReplyDeletePython training in marathahalli bangalore | Best aws training in marathahalli bangalore | Best Devops training in marathahalli bangalore
Awesome..You have clearly explained …Its very useful for me to know about new things..Keep on blogging.
ReplyDeleteDevOps course in Marathahalli Bangalore | Python course in Marathahalli Bangalore | Power Bi course in Marathahalli Bangalore | Best Data Science Training in Marathahalli Bangalore | Deep Learning course in Marathahalli Bangalore | NLP course in Marathahalli Bangalore